10 golden tips for watch photography
10 golden tips for watch photography
Some time ago I was asked to write an article about watch photography for Focus, a Dutch photography magazine. In the article I shed my light over this specialism which has a steep (and still ongoing) learning curve. Most of the things learned over the years also help me during most my commercial assignments as a freelance photographer. Here is a copy of my article about the 10 golden tips for watch photography.
With an interest in watches for many years, somewhere around 2008 I got sucked into the horological world. Powered by my growing interest to know more about mechanical watches I ran into the same forums over and over again. After joining several forums, and without knowing it at the time, I also started my photographic journey. After posting my first and terrible blurry photo I made the remark ‘will look into quality photography’ and so I did.
Being an enthusiast hobby photographer at that time I started experimenting endlessly over the following years. Always critically looking at the results and looking for improvement. About 5 years later I had made 3 watch calendars, had my images published in several magazines and could proudly show my first cover shot. A lot of people ask me ‘what is the best camera?’, ‘what lens do you use?’ etc. For as far as I can answer these questions, they tell nothing about the real question, how do you take a photo of a watch, as this takes so much more than just a ‘good’ camera and lens. Here are ten easy tips to lift your watch photography to a higher level.
1 – Tripod
Always use a tripod to prevent camera shake. The closer you are to any subject you are trying to photograph, the more visible this shake will be. Each minimum movement is disastrous for the sharpness of your photo. As not all tripods are equally solid, sometimes even the mirror flipping up can already cause so much vibration that it is almost impossible to take a sharp photo. In this case it is advisable to use the ‘mup function’ (mirror lock-up) of the camera. With this function turned on the mirror will first flip up and the camera will take a photo after some delay (or at a second push of the button) thus preventing vibrations of the mirror to effect your photo. Furthermore, make sure that all buttons, knobs and clamps are tight, and preferably photograph with a remote control or the built-in timer. If your center column has a hook, add some weight for some extra stability.
2 – Accessories
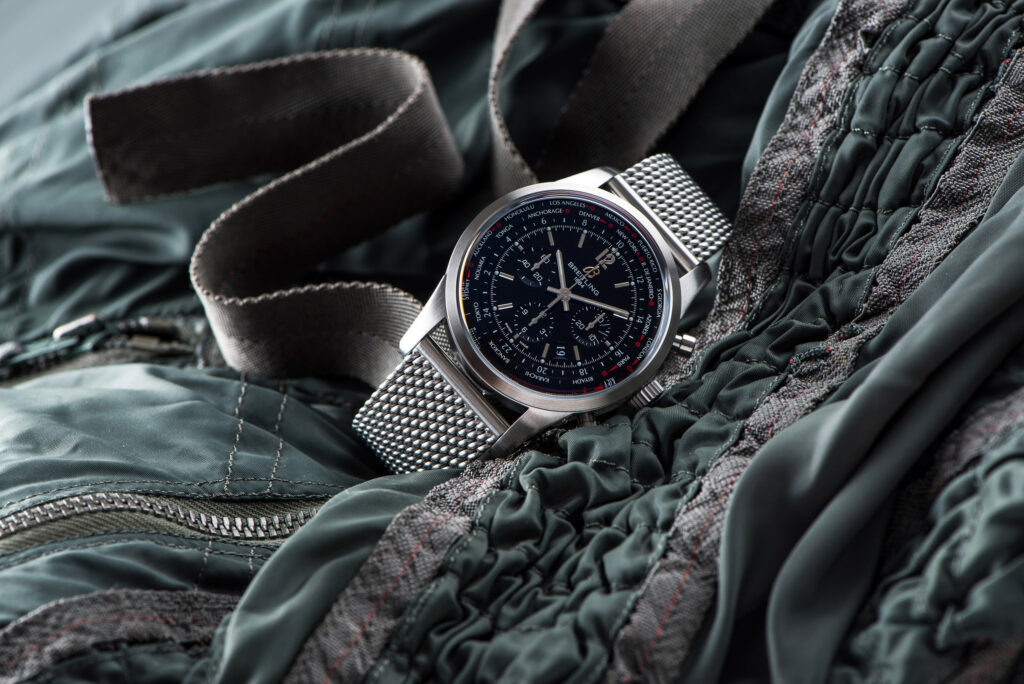
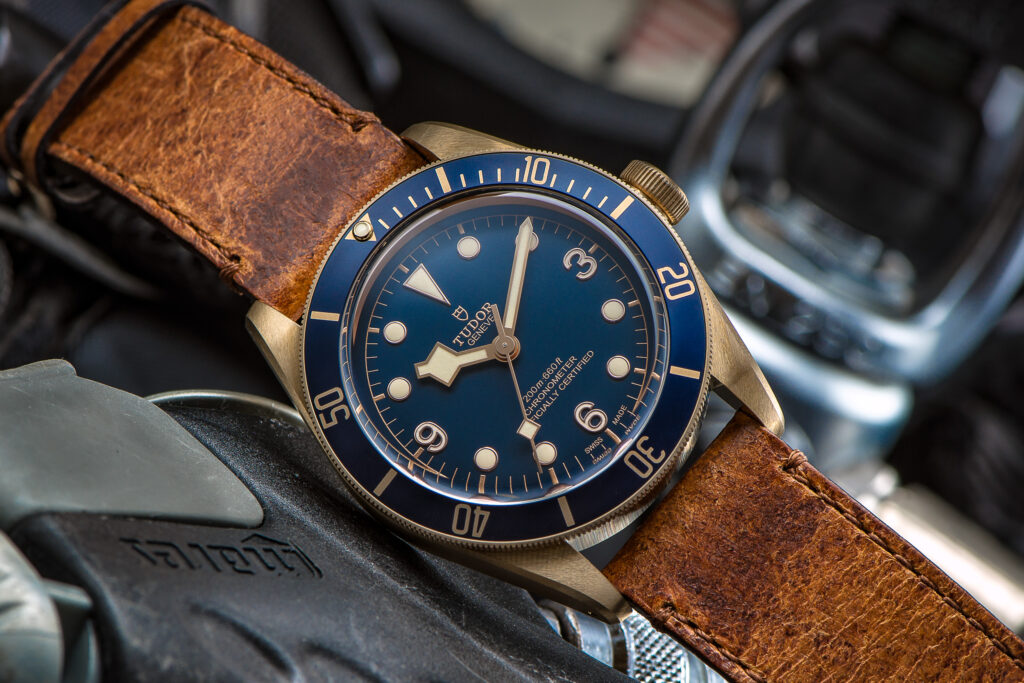
Before you actually start with the photoshoot itself, you should consider finding one or more accessories to create an overall picture. Depending on the type of watch and the final result you are trying to create this can be pretty much anything. Grab something from the kitchen, like sea salt or coffee beans. Old and slightly weathered or raw materials are also perfect as a background and / or surface. Think of a wooden (garden) table or a piece of (slate) stone. Want to go all the way? Try to borrow (part of) some diving equipment to photograph a diving watch. The choice of the background really has one limitation, and that is your own creativity. Sometimes you just want to keep it clean and simple, choosing a minimalist background. In this case try to prevent other elements and / or shades of objects in the picture.
10 golden tips for watch photography
3 – Cleaning
Try to clean the watch thoroughly thoroughly just before you start with your photoshoot. Use a dry lint-free cloth or microfiber cloth. Small edges in the case and hard to reach places are easy to clean with cotton swabs with a little acetone or rubbing alcohol on it. You can buy these at the local drug store for a few dollars. Do make sure that you do not use it on a leather strap! Leather may discolor or damage from contact with these liquids. The narrow space between the case and the strap can be easily cleaned with a paintbrush. Experience learned that it’s almost impossible to get a watch 100 percent clean and dust free, no matter how thoroughly you try to clean it. Residual dust and/or dirt that is still visible, can always be digitally removed. Although this can be a time consuming task if not cleaned properly. Prevention is better than cure.
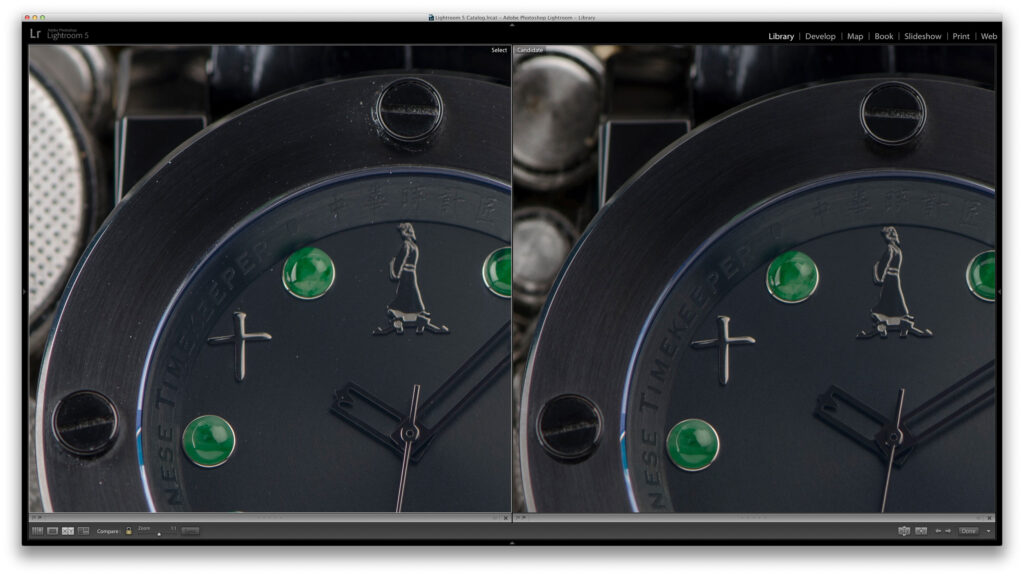 No matter how well you clean a watch, you cannot avoid removing dust in the digital process. Screenshot of before and after digital the dust removal process.
4 – Hands
You see it in almost any commercial product photo of a watch. The hands of the watch are approximately at 10 minutes past 10, and the second hand is at plus or minus 30 seconds. This makes the whole face of the watch visually symmetrical, and the distance between the hands is equally divided into thirds. If your watch has a hacking movement you can stop it by pulling out the crown when the second hand is in the correct position and set the hour and minute hands. The crown can later be edited back into position using an photo editing program. Without such software or with a non-hacking movement you set the time a few minutes earlier. Then it’s just a matter of waiting and take the photo at the right time. Do keep in mind that you don’t use slow shutter speeds to prevent motion. With chronograph watches, the extra hands are often pointing up or in a direction that keeps the dial best visible.
5 – Composition
Now it’s time to combine the watch and accessories into a composition. To create a frame filling layout, it is important to look closely at the use of the accessories and the way the watch is placed in or onto them. This really is a matter of trying. Sometimes your composition is spot on right away, most of the time it takes a you at least half an hour. As with the position of the hands you also have a few guidelines here. A closed strap looks the best when it appears as if it is worn around the wrist. This will demonstrate how similar good wearing the watch actually. A leather strap forms more or less naturally in this position. A metal band usually needs some help, especially if it made with small links. A C-clip from a watch stand is a perfect help. The big advantage over the plastic version is that you can easily adjust the size. When shooting with an opened leather strap is recommended not to rise the strap over the case.
So lay down flat, or better yet, fold the strap slightly backwards on both sides. To achieve this, you simply put something underneath the case so that the ends of the strap can be positioned lower, or you position the watch on it’s side fold the ends of the strap slightly back. Most of the metal bands are provided with a folding clasp. These can be shaped round by hand (and some patience) quite easily with with a partly or fully opened clasp.
10 golden tips for watch photography
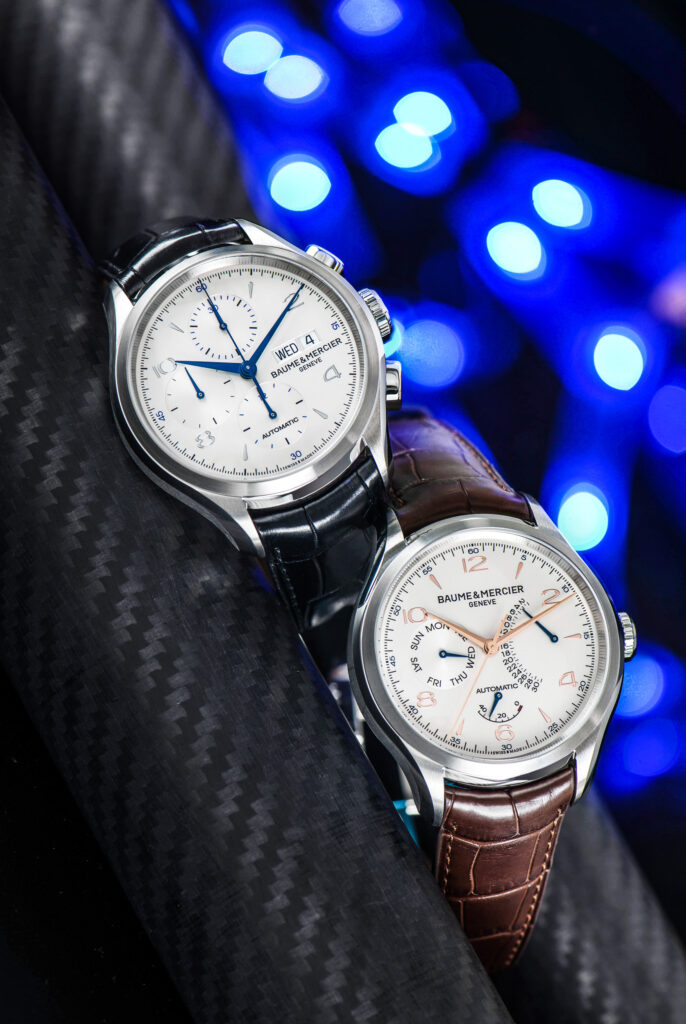
Position the watch in such a way that the text on the dial still (easy) is readable. The guideline is that the text can be rotated up to 90 degrees. In a further rotation, the text will be upside down. Which makes it unnaturally to read in a normal way. On the case back there are often more words or lines of text engraved. In this case, you can either choose to the use the middle to keep as a center, thus make it reasonably easy to read it all. Or choose a composition that makes the watch or the most interesting parts stand out. Also, at the rear and the upper part are visibility and readability (texts) of great importance.
6 – ISO
Set your camera to a low ISO value. Current cameras have increasingly good and high ISO settings. This sounds convenient, but for the sharpness of your pictures this is disastrous. This is where the tripod also helps. If you can stop the movement, the shutter speed not an issue as you are photographing a static setup. You choose the aperture according to the depth of field that you want to create.
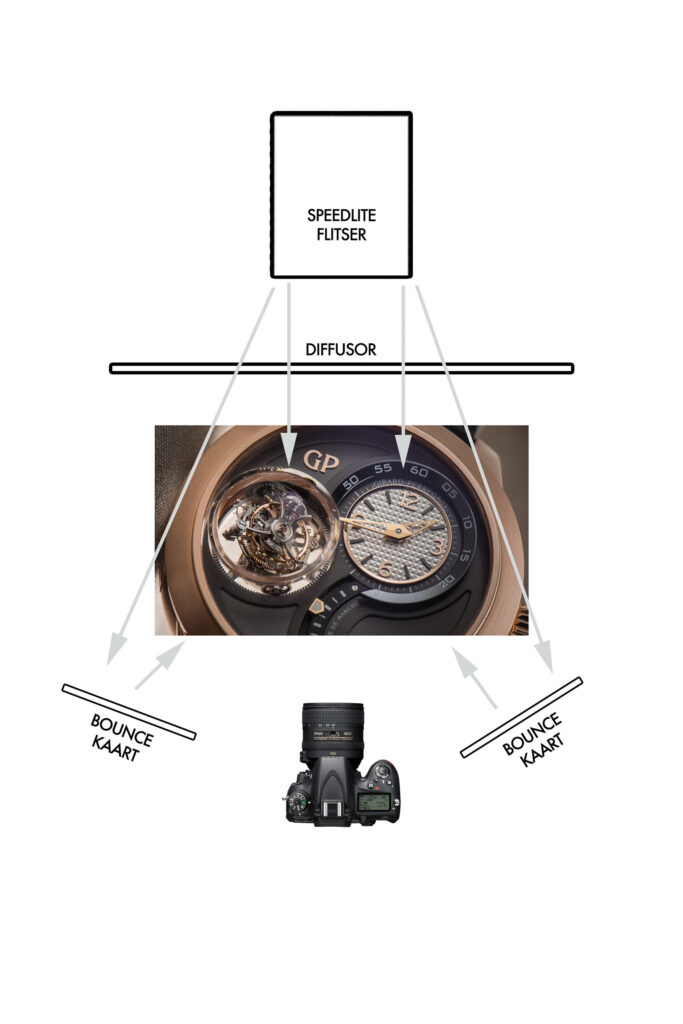
With one light source (natural or artificial) and one or more bounce cards you already brightening good shadows
7 – Diffuse daylight
Most watches are easily photographed with diffuse light. Heavily overcast weather is perfect for this. In an outdoor situation, a watch, if not too many obstacles there are around, will be illuminated uniformly – perfectly. Indoors this is another story. A simple but very useful tip is to bounce off light using a light object. Simplicity is master when it comes to the 10 golden tips for watch photography: simply use a white object (white or neutral light gray is best to avoid color casts).
I use this technique very often for a quick picture of just about anything to make ik look better. And to do so I literally use what is available, such as an envelope, an empty Chinese food box or the aluminum back of my MacBook screen. Just put a watch on a table near a window, place the bounce object on the shady side of the watch and just see what happens. You sort of create a second light source. By moving the reflector towards and away from the watch, you can determine the strength of the fill light. Almost as if you are drawing with light. Conversely, you can also remove light with dark objects and create shade.
8 – Artificial light
The next step is the use of artificial light. Depending on how many lights or flashes you have at your disposal, you can make it as complicated as you want. However, using diffuse light is important. Think of one or more studio flash unit(s) with softbox or a light tent with lamp(s) or flash unit(s). Here you also use extra light reflective or absorbent material to add or omit light. To stay away from unwanted reflections in the watch glass you have to experiment with the position you use for your light source(s). My experience learned me that you have to experiment with the position of the lights to reach the best results.
10 golden tips for watch photography
Personally, I started with a light tent and two cheap desk lamps from that well-known Swedish furniture store. At some point these were replaced by cheep manual camera flashes asI wanted more control over the light. Experimenting with different power settings and lighting setups you van vary endlessly. Although more complicated isn’t necessarily better. For Baselworld I have developed our ‘top-secret Baselbox’. This is just one single flash combined with some translucent sheets and allows us to shoot something like this in under one minute on the edge of a desk.
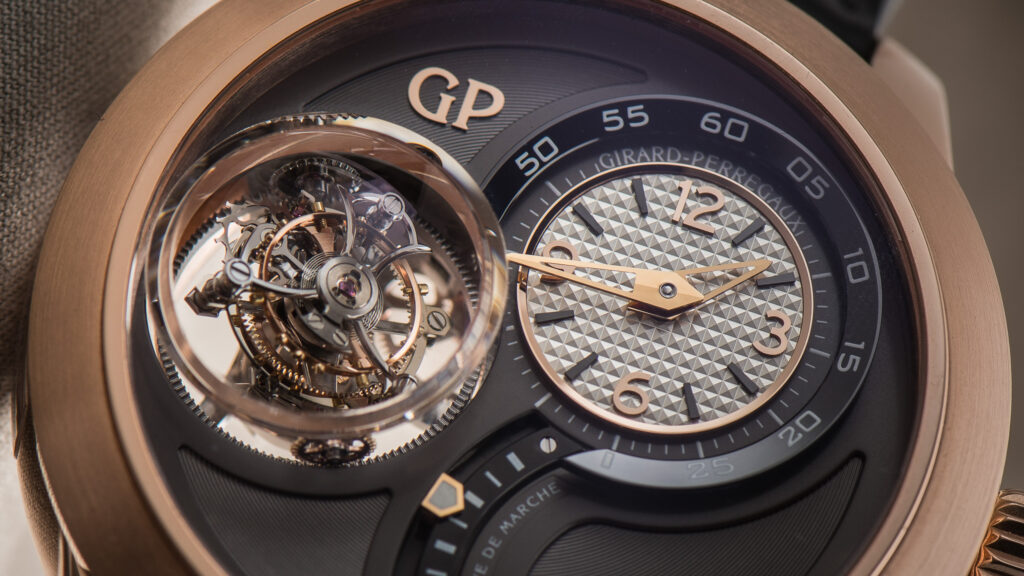
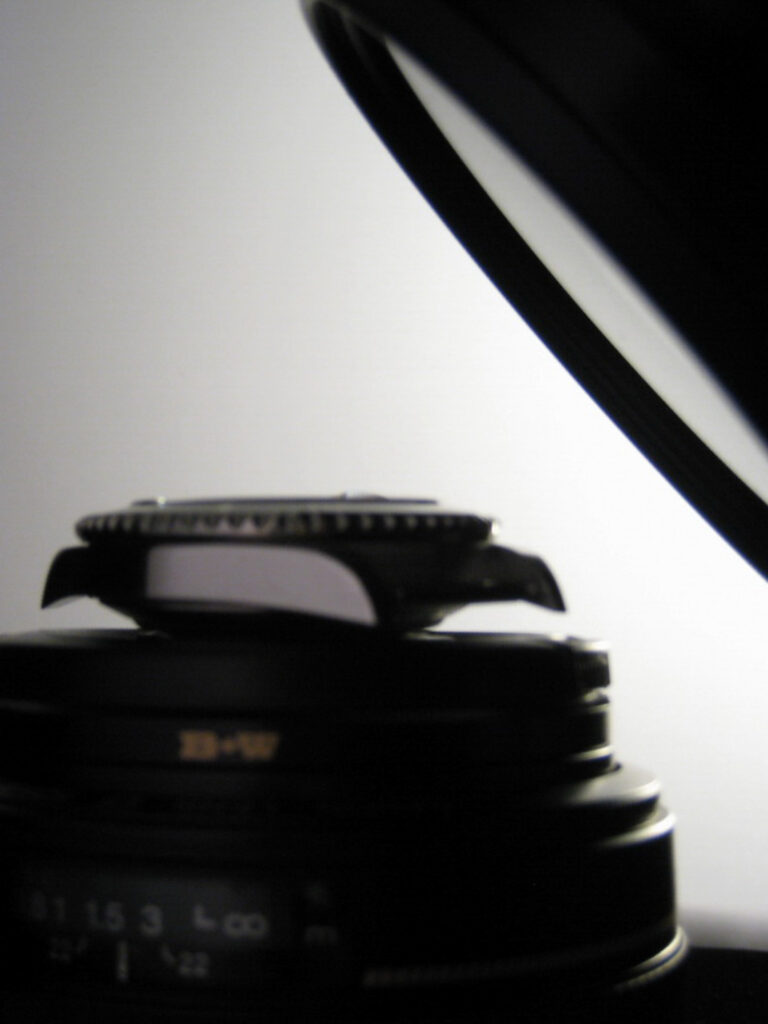
In extreme close-ups lighting deserves special attention.
9 – Macro and Close-up
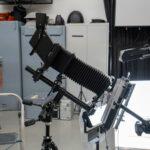
When creating macro photos of watches you can use the same guidelines (apart from the accessories) to create a compelling photo. But now it is more important to have a good look at what you do of do not put in the picture. If a particular detail on the edge of your photo only fits in for a fraction of image, try this completely get out it of the picture – or more visible in the picture. Always make sure that the most important details you want to capture are completely visible. To be able to re-compose the photo afterwards, you shouldn’t frame the photo too narrow. Zoom out or move the camera backwards for the extra margin. Because in macro photography you sometimes get so close to the object, you will find that there is less light available. So make use of an additional light source and/or one or more bounces to direct the available light to the desired location. Personally I like to work with a longer macro lens (100/105 mm) on a full-frame body.
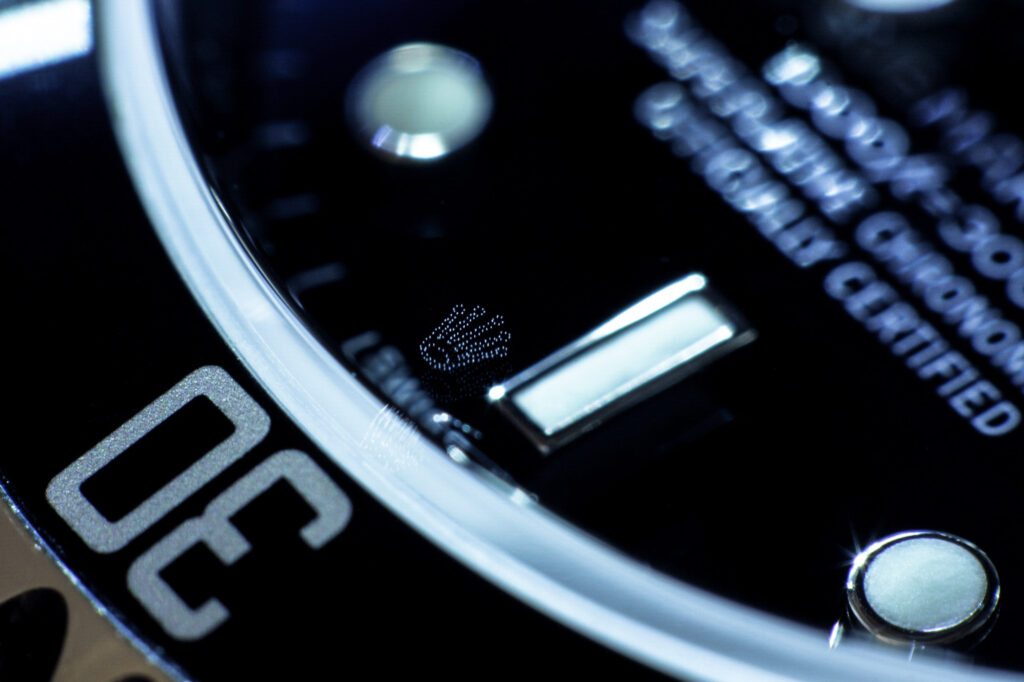
When you find that too expensive to experiment with you should consider a set of extension rings. These are available for most popular cameras and reasonably priced. The use of one or more intermediate rings ensures that the minimum focus distance of lens can be shortened. This way your standard lens can suddenly focus much closer that get your subject correspondingly larger.Expensive hardware is not a must. This detail is made with a Canon EOS 40D and a 50 mm standard lens. The MFD (minimum focusing distance) of this lens is normally 45 inches. Using spacers, it is possible to focus on just a few inches away.
10 – Practice makes perfect
Watch Photography remains very time-consuming and requires a lot of practice and trying. Add it all up you are easily busy for an hour before you actually need your camera and the search for the right lighting begins. Don’t be surprised if you’ve taken 50 photos before it starts to look rightWatches. After this the fine tuning begins where you actually do the same, but more in detail. By highlighting certain details you slowly work your way to the end result which you are going to optimize later digitally. Over time you will notice that you run into limitations and want to go to the next level. That’s when things like focus stacking (sharpness) and combining multiple photos into one come into play.
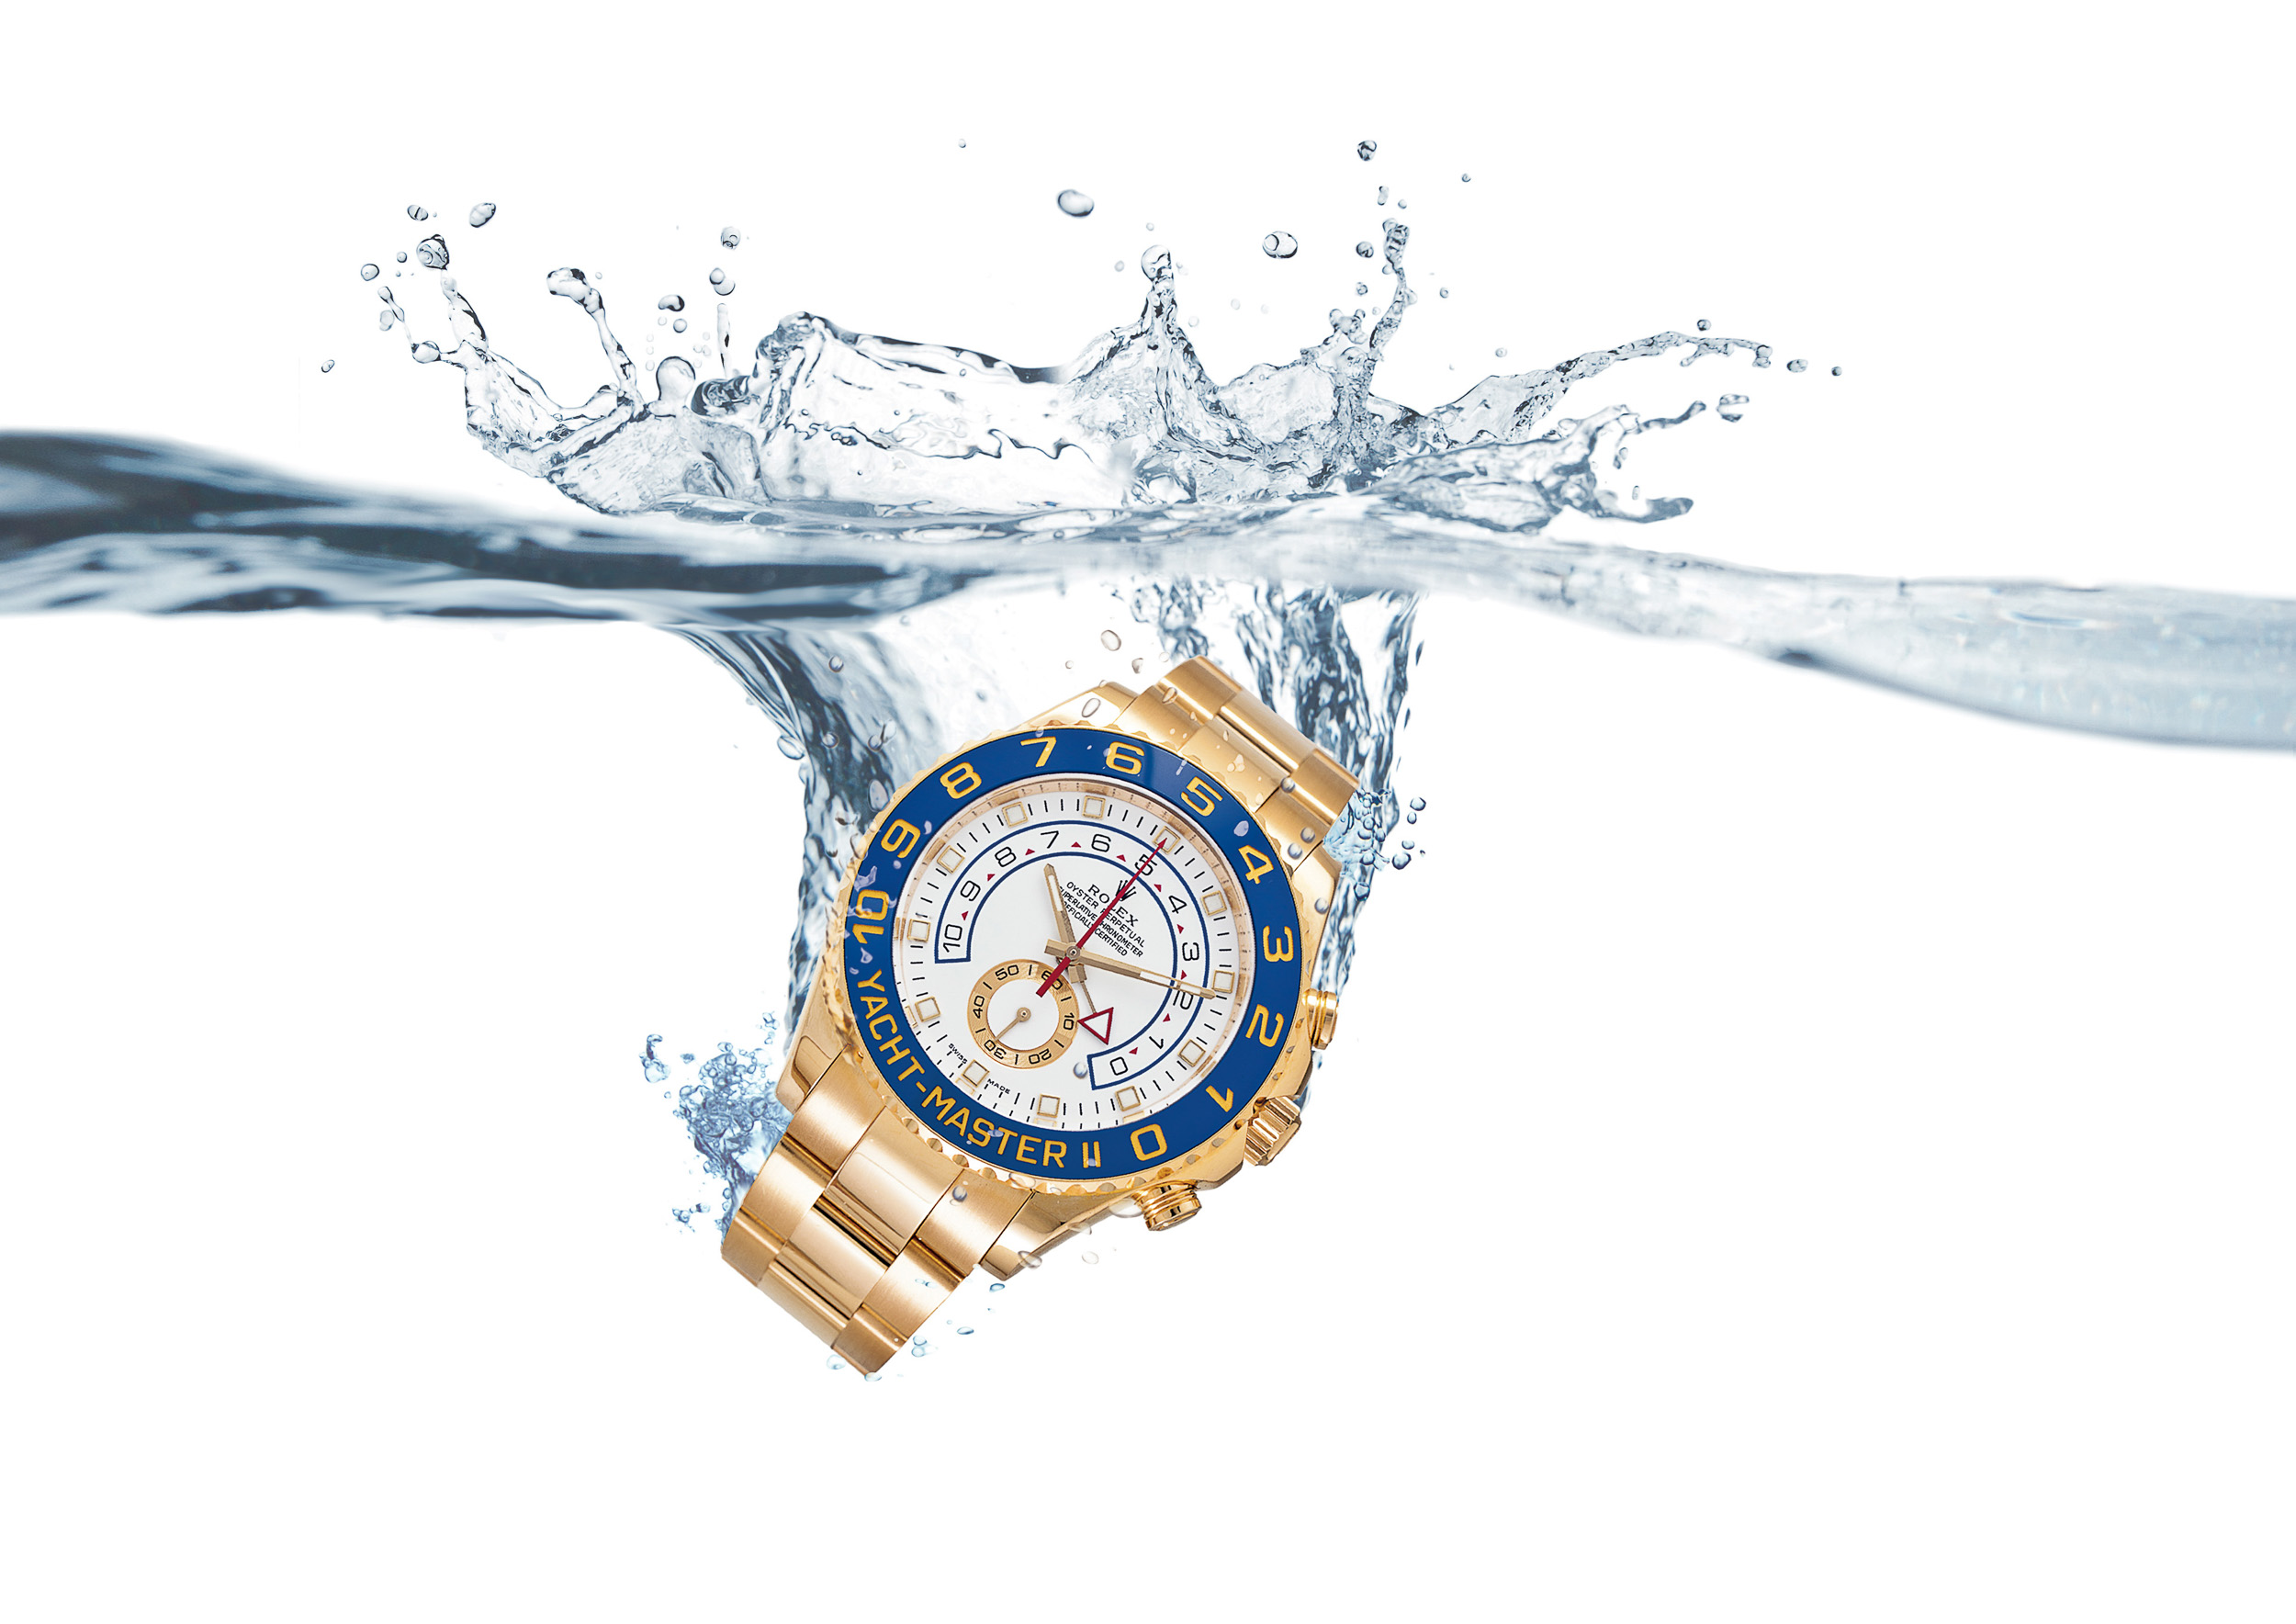
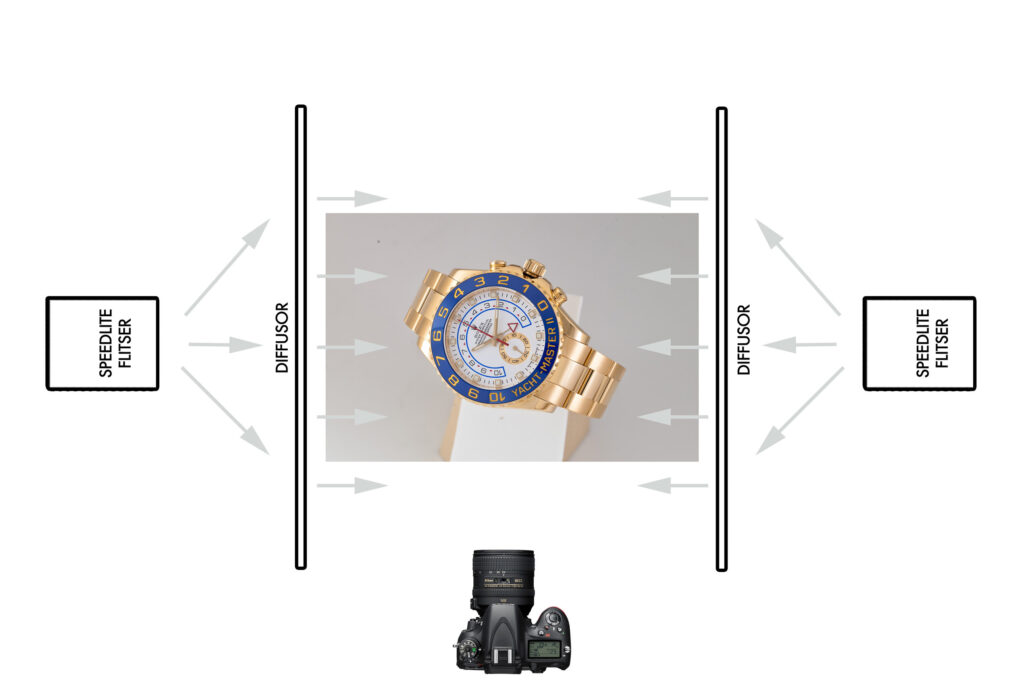
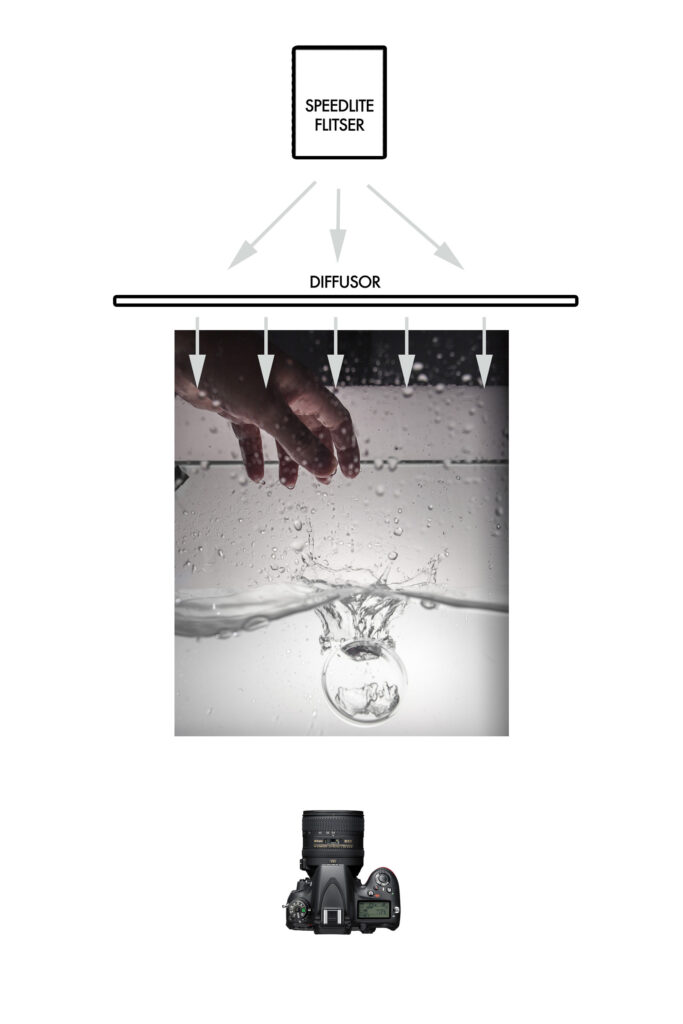
 A photo editing based around several photos. Passing the light setups for the product shot (‘lighting rod’ for an as even as possible illumination) and the water absorption where the watch is mounted in afterwards.
 Previous post
BMW Art Car A. Lange & Söhne
Previous post
BMW Art Car A. Lange & Söhne
 Next post
Wet Plate Photography
Next post
Wet Plate Photography